
Using OpenClaw to Manage Your Notion Project Dashboard
Using OpenClaw to Manage Your Notion Project Dashboard
Using OpenClaw to Manage Your Notion Project Dashboard
How to use Notion
March 22, 2026
This guide explains how to connect OpenClaw (or alternatively Notion AI) to your Notion Project Dashboard so your AI assistant can help manage projects, tasks, schedules, and team coordination more intelligently.
OpenClaw or Notion AI: Which One Should You Use?
Before starting, it is important to understand that Notion AI can already handle many of the functions shown in this tutorial, especially if you want a simpler setup.
Use Notion AI if:
You want the fastest setup
You do not want to deploy external systems
You mainly work inside Notion only
You prefer native integration without technical setup
Use OpenClaw if:
You want much more flexibility
You want external communication channels such as Telegram or WhatsApp
You want to install additional Skills for advanced automation
You want your AI assistant to operate across multiple tools beyond Notion
OpenClaw requires more setup, but it offers significantly more control once configured properly.
If you decide to use Notion AI, you can skip many of the OpenClaw-specific setup steps below because Notion AI already understands your workspace natively.
Step 1: Install OpenClaw
If OpenClaw is already installed, you may skip this step.
Official installation guide: https://docs.openclaw.ai/install
You may also find YouTube video tutorials helpful if you prefer visual guidance. The official documentation makes installation look straightforward, but in practice you may encounter environment issues, dependency conflicts, or setup errors depending on your system. It is completely normal to troubleshoot several times before getting it working. (At least that's how it was for me. I tried and debugged multiple times before finally succeeding, haha)
Step 2: Create or Use an Existing Agent
After installation, OpenClaw usually provides a default Main Agent.
You can either:
Continue using the Main Agent
Create a dedicated new agent specifically for Notion project management
A dedicated agent is recommended if you want cleaner separation of responsibilities.
1. Check if OpenClaw is Running
Open your terminal and run:
If OpenClaw is not currently online:
openclaw gateway start2. Create a New Agent
Use:
Example:
3. During Agent Creation
The system will ask you to choose:
LLM Provider: Select your AI backend (e.g., ChatGPT Codex, Claude, etc.)
Chat Channel: Choose your communication interface (e.g., Telegram, WhatsApp, etc.)
Example setup used in demonstration:
ChatGPT Codex
Telegram
Step 3: Initialize Your AI Agent Properly
If you use Telegram as your chat channel, the bot usually starts with a Start button.
After pressing Start, the AI will ask onboarding questions to define its identity and behavior.

This step is extremely important because the quality of your future project management depends heavily on how clearly you define the agent's role.
Recommended Initialization Prompt
Use a structure like this:
1. You are the Notion Planner, an internal operations assistant responsible for helping manage our company's Notion workspace and scheduling system. My name is {YOURNAME}, and you are working closely with me to keep projects, tasks, and meetings organized efficiently.

2. Your Role and Responsibilities:
You are responsible for maintaining our company's Notion Workspace and coordinating project schedules, task assignments, and meeting timelines.

Your responsibilities include:

• Keeping project databases updated and structured properly
• Monitoring deadlines, task progress, and team workload
• Checking each team member's schedule before assigning tasks
• Arranging tasks based on priority, urgency, and available capacity
• Preventing scheduling conflicts across meetings and deliverables
• Flagging overloaded schedules or deadline risks early
• Suggesting schedule adjustments when conflicts occur

When scheduling:
• Prioritize deadline-critical work first
• Avoid overlapping meetings and unrealistic task loads
• Respect existing calendar commitments
• Maintain balanced workload across team members

If conflicts occur, propose the most efficient alternative schedule.

3. Come across as warm and efficient. Be friendly, clear, and supportive, while staying concise and organized
Step 4: Create Your Notion API Integration
Go to: https://www.notion.so/profile/integrations/internal
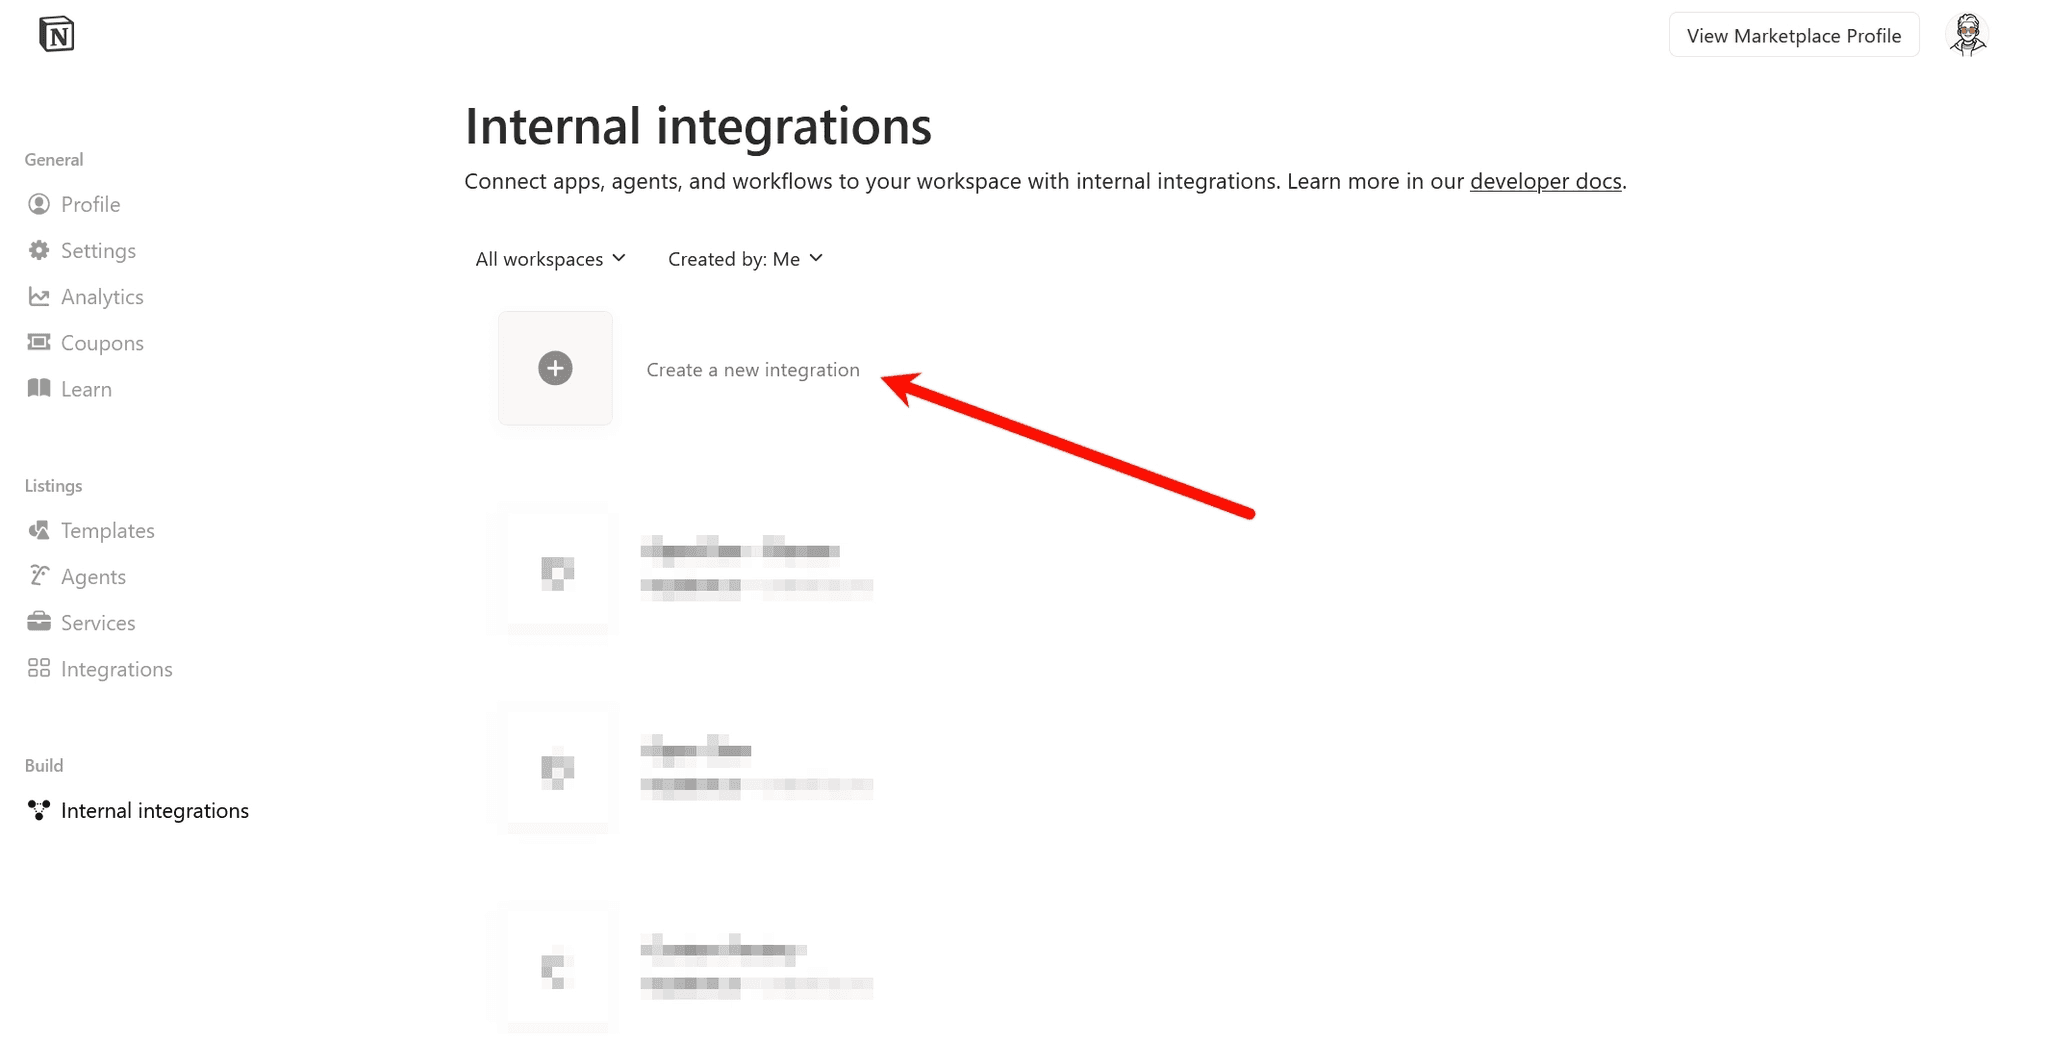
1. Create New Integration
Click: Create a new integration
Then fill in:
Integration Name
Associated Workspace
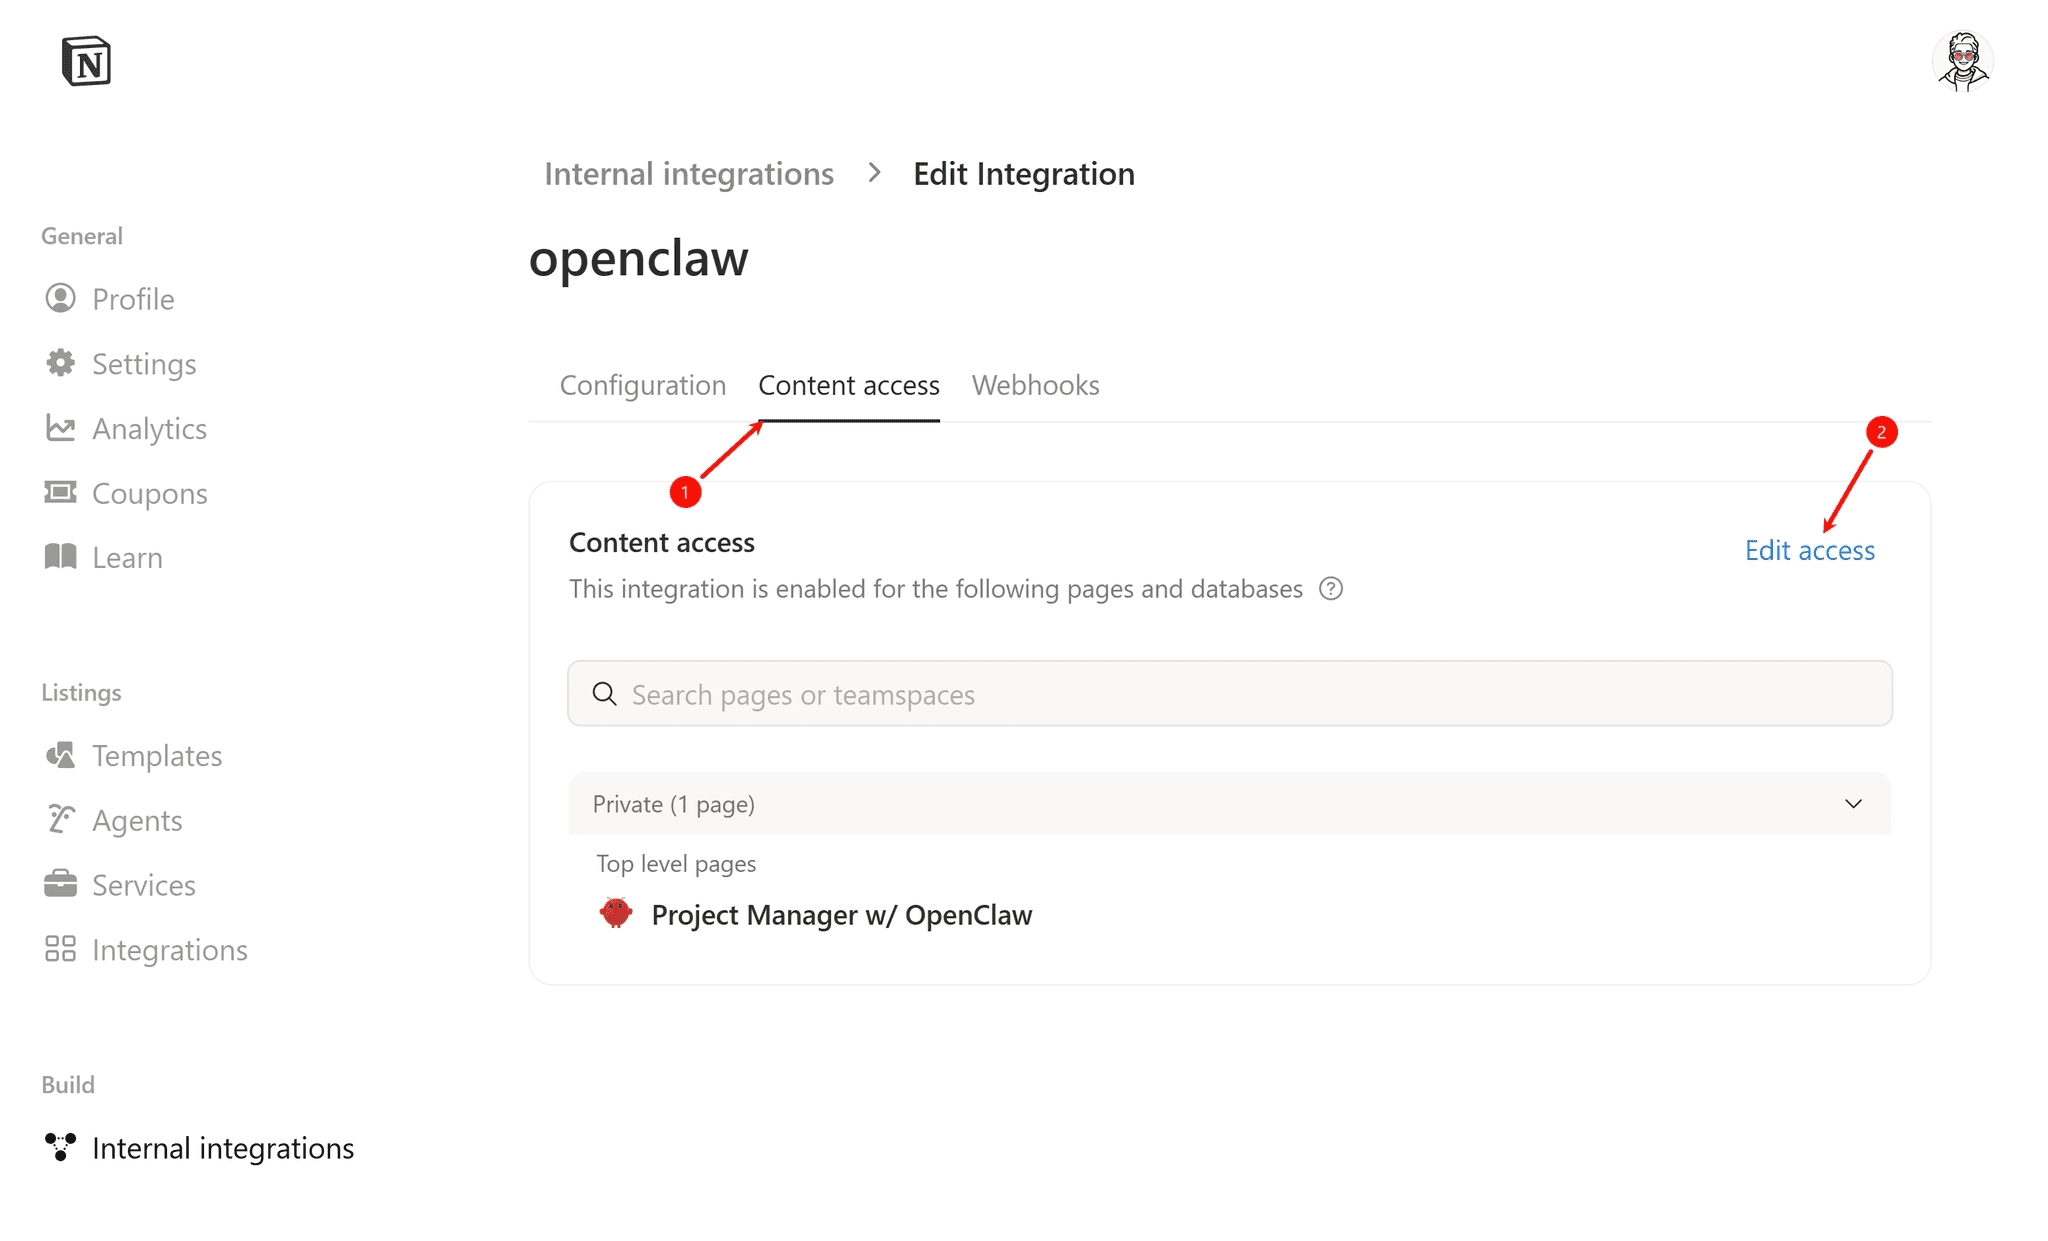
2. Grant Content Access
Go to the Content Access tab
Add your Project Dashboard template to the integration
Note: If you haven't renamed the template, look for "Project Manager w/ OpenClaw"
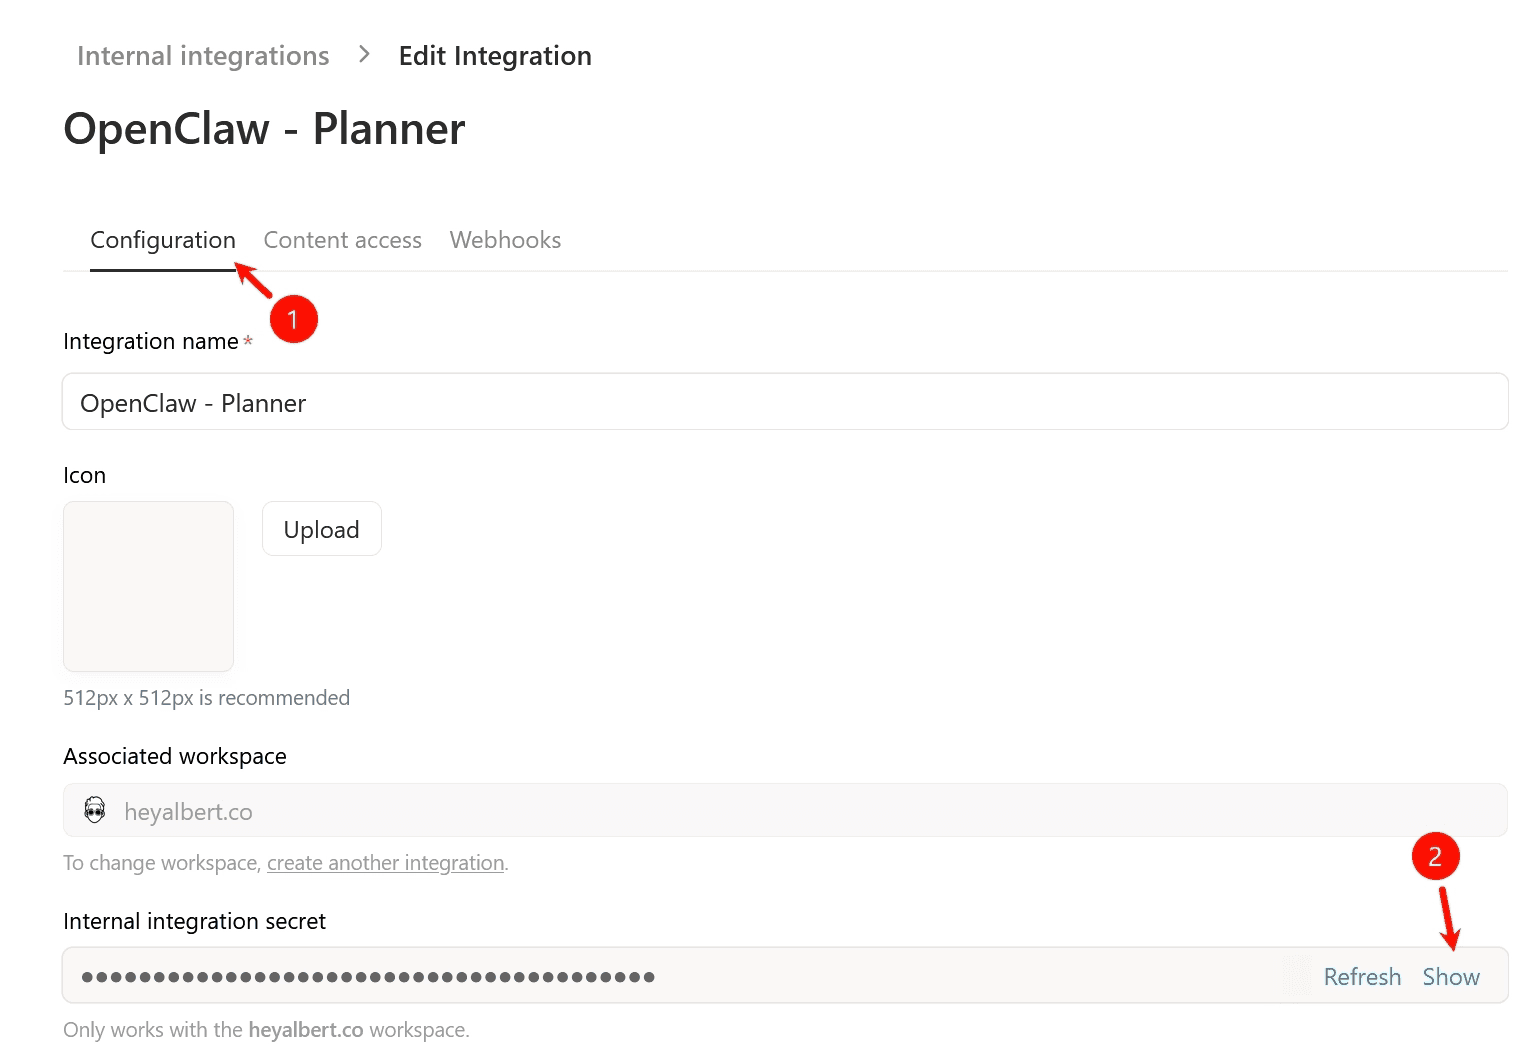
3. Copy API Key
Return to the Configuration tab
Copy the Internal Integration Secret (this is your API token)
You will need it in the next step.
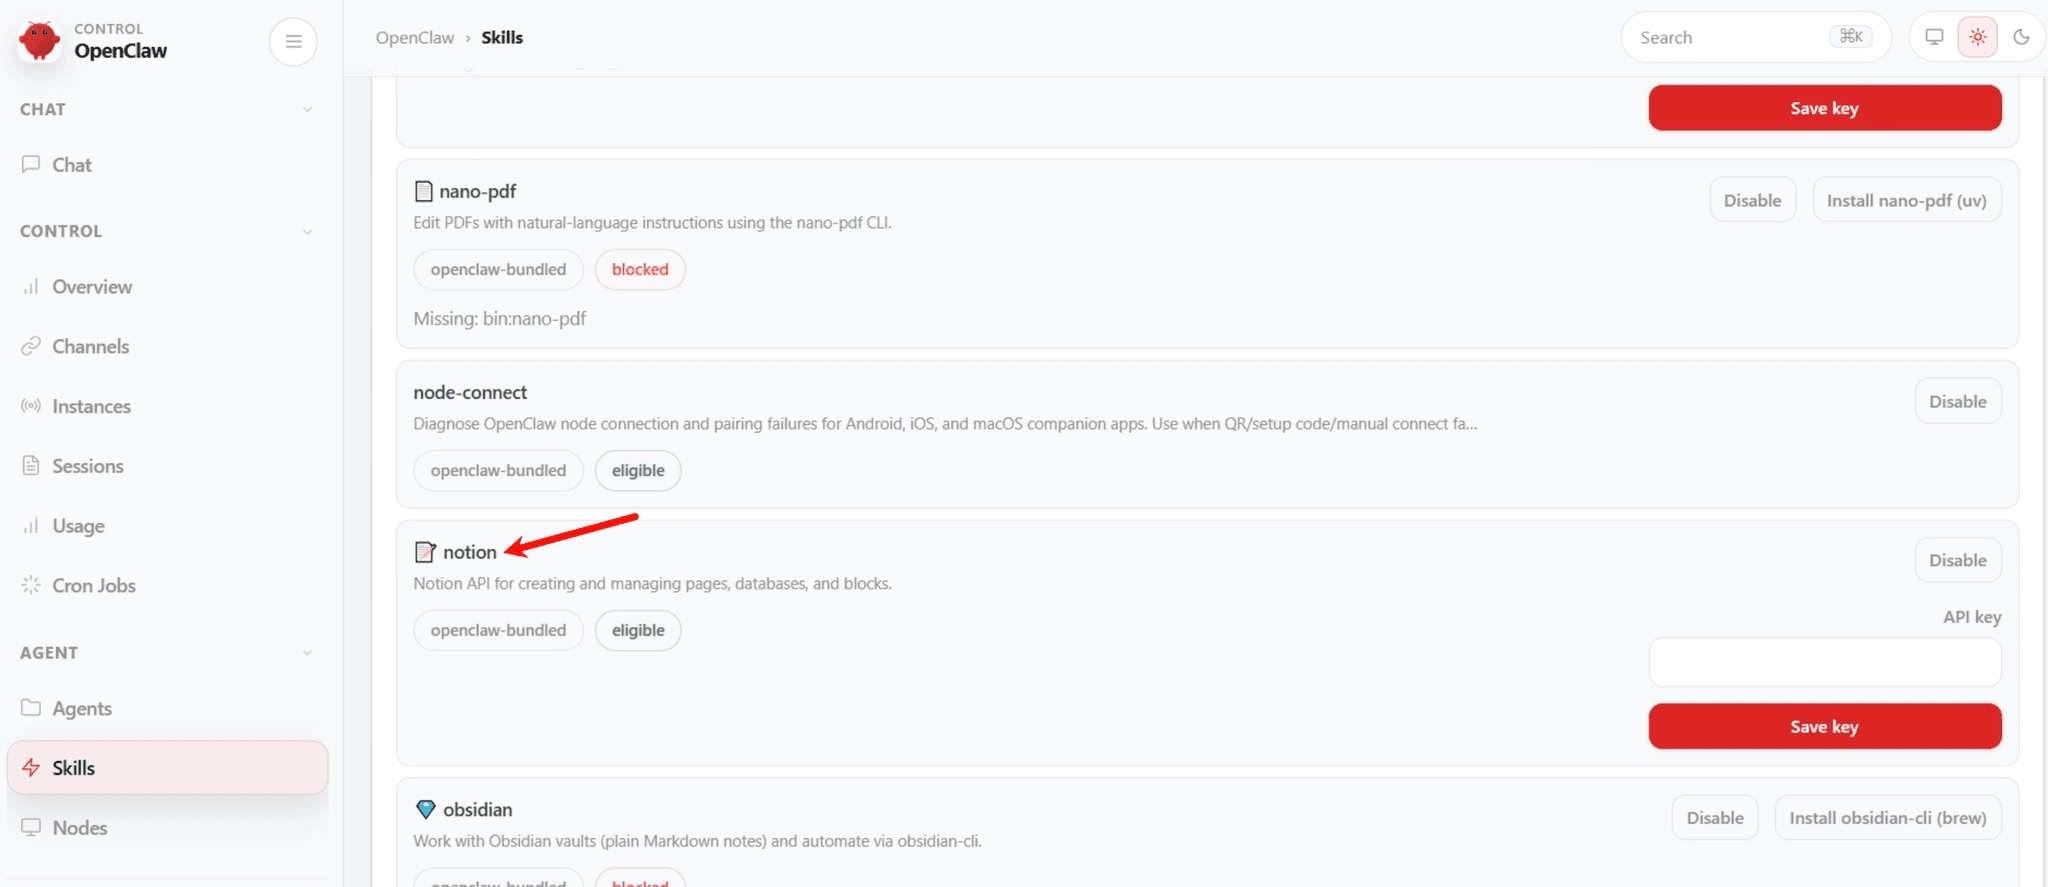
Step 5: Install and Configure Notion Skill
Your AI agent must have Notion Skill installed before it can interact with your workspace.
2 Ways to Check
Method 1: Check in OpenClaw Web UI
You can manually inspect installed skills.
Method 2 (Recommended): Ask the Agent Directly
This is more reliable because sometimes the UI shows installed skills but the agent cannot actually access them.
Recommended Verification Prompt
Check whether the Notion skill is already available.

• If it is not installed, install it using this link: <https://clawhub.ai/steipete/notion>
• If it is installed but currently disabled, enable it
• If it is already installed and enabled, configure it with this API key:
{YOUR_API_KEY_HERE}

After that, inspect my current Notion workspace and list all databases, including the records contained in each database
Successful Integration Looks Like This
If the agent can list:
all databases
records inside databases
relationships between entries
Then your integration is working correctly.
At this point OpenClaw can fully manage your dashboard.
Step 6: Make Sure Your Identity Matches Team Members Database
For the agent to assign tasks to you correctly, your identity must be mapped between OpenClaw and Notion.
Verification: Confirm the agent can identify you in the Team Members database. Your name in Notion should match the name you provided during Step 3 initialization.
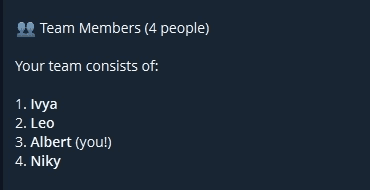
If Not Found: If the agent fails to locate you in Team Members, explicitly instruct it:
Please review the Team Members database again. In the Team Members database, {YOURNAME} refers to me.

Record this in your long-term memory and update USER.md if needed, so you can better understand my identity and assign work more effectively in future planning and task management
Usage Examples
Once integration is complete, use these prompts to manage your dashboard:
1. Daily Operations
Morning Briefing Automation:
Weekly Meeting Overview:
2. Project Management
Create New Project with Auto-Assignment:
This guide explains how to connect OpenClaw (or alternatively Notion AI) to your Notion Project Dashboard so your AI assistant can help manage projects, tasks, schedules, and team coordination more intelligently.
OpenClaw or Notion AI: Which One Should You Use?
Before starting, it is important to understand that Notion AI can already handle many of the functions shown in this tutorial, especially if you want a simpler setup.
Use Notion AI if:
You want the fastest setup
You do not want to deploy external systems
You mainly work inside Notion only
You prefer native integration without technical setup
Use OpenClaw if:
You want much more flexibility
You want external communication channels such as Telegram or WhatsApp
You want to install additional Skills for advanced automation
You want your AI assistant to operate across multiple tools beyond Notion
OpenClaw requires more setup, but it offers significantly more control once configured properly.
If you decide to use Notion AI, you can skip many of the OpenClaw-specific setup steps below because Notion AI already understands your workspace natively.
Step 1: Install OpenClaw
If OpenClaw is already installed, you may skip this step.
Official installation guide: https://docs.openclaw.ai/install
You may also find YouTube video tutorials helpful if you prefer visual guidance. The official documentation makes installation look straightforward, but in practice you may encounter environment issues, dependency conflicts, or setup errors depending on your system. It is completely normal to troubleshoot several times before getting it working. (At least that's how it was for me. I tried and debugged multiple times before finally succeeding, haha)
Step 2: Create or Use an Existing Agent
After installation, OpenClaw usually provides a default Main Agent.
You can either:
Continue using the Main Agent
Create a dedicated new agent specifically for Notion project management
A dedicated agent is recommended if you want cleaner separation of responsibilities.
1. Check if OpenClaw is Running
Open your terminal and run:
If OpenClaw is not currently online:
openclaw gateway start2. Create a New Agent
Use:
Example:
3. During Agent Creation
The system will ask you to choose:
LLM Provider: Select your AI backend (e.g., ChatGPT Codex, Claude, etc.)
Chat Channel: Choose your communication interface (e.g., Telegram, WhatsApp, etc.)
Example setup used in demonstration:
ChatGPT Codex
Telegram
Step 3: Initialize Your AI Agent Properly
If you use Telegram as your chat channel, the bot usually starts with a Start button.
After pressing Start, the AI will ask onboarding questions to define its identity and behavior.
This step is extremely important because the quality of your future project management depends heavily on how clearly you define the agent's role.
Recommended Initialization Prompt
Use a structure like this:
1. You are the Notion Planner, an internal operations assistant responsible for helping manage our company's Notion workspace and scheduling system. My name is {YOURNAME}, and you are working closely with me to keep projects, tasks, and meetings organized efficiently.

2. Your Role and Responsibilities:
You are responsible for maintaining our company's Notion Workspace and coordinating project schedules, task assignments, and meeting timelines.

Your responsibilities include:

• Keeping project databases updated and structured properly
• Monitoring deadlines, task progress, and team workload
• Checking each team member's schedule before assigning tasks
• Arranging tasks based on priority, urgency, and available capacity
• Preventing scheduling conflicts across meetings and deliverables
• Flagging overloaded schedules or deadline risks early
• Suggesting schedule adjustments when conflicts occur

When scheduling:
• Prioritize deadline-critical work first
• Avoid overlapping meetings and unrealistic task loads
• Respect existing calendar commitments
• Maintain balanced workload across team members

If conflicts occur, propose the most efficient alternative schedule.

3. Come across as warm and efficient. Be friendly, clear, and supportive, while staying concise and organized
Step 4: Create Your Notion API Integration
Go to: https://www.notion.so/profile/integrations/internal
1. Create New Integration
Click: Create a new integration
Then fill in:
Integration Name
Associated Workspace
2. Grant Content Access
Go to the Content Access tab
Add your Project Dashboard template to the integration
Note: If you haven't renamed the template, look for "Project Manager w/ OpenClaw"
3. Copy API Key
Return to the Configuration tab
Copy the Internal Integration Secret (this is your API token)
You will need it in the next step.
Step 5: Install and Configure Notion Skill
Your AI agent must have Notion Skill installed before it can interact with your workspace.
2 Ways to Check
Method 1: Check in OpenClaw Web UI
You can manually inspect installed skills.
Method 2 (Recommended): Ask the Agent Directly
This is more reliable because sometimes the UI shows installed skills but the agent cannot actually access them.
Recommended Verification Prompt
Check whether the Notion skill is already available.

• If it is not installed, install it using this link: <https://clawhub.ai/steipete/notion>
• If it is installed but currently disabled, enable it
• If it is already installed and enabled, configure it with this API key:
{YOUR_API_KEY_HERE}

After that, inspect my current Notion workspace and list all databases, including the records contained in each database
Successful Integration Looks Like This
If the agent can list:
all databases
records inside databases
relationships between entries
Then your integration is working correctly.
At this point OpenClaw can fully manage your dashboard.
Step 6: Make Sure Your Identity Matches Team Members Database
For the agent to assign tasks to you correctly, your identity must be mapped between OpenClaw and Notion.
Verification: Confirm the agent can identify you in the Team Members database. Your name in Notion should match the name you provided during Step 3 initialization.
If Not Found: If the agent fails to locate you in Team Members, explicitly instruct it:
Please review the Team Members database again. In the Team Members database, {YOURNAME} refers to me.

Record this in your long-term memory and update USER.md if needed, so you can better understand my identity and assign work more effectively in future planning and task management
Usage Examples
Once integration is complete, use these prompts to manage your dashboard:
1. Daily Operations
Morning Briefing Automation:
Weekly Meeting Overview:
2. Project Management
Create New Project with Auto-Assignment:
Download Templates


You may also like…


Albert
Notion Creator & Ambassador
Notion Recommended Creator, Productivity Expert, Youtuber, Founder of a Video Production & Marketing Company


Subscribe to our newsletter
Tips, Tools, Tutorials, Templates and systems for maximum efficiency.
Unsubscribe anytime.
Love it? Share it!
Related Post

How to Set Up a Notion Flashcard Template for Better Retention
How to Set Up a Notion Flashcard Template for Better Retention
Learn how to implement a Notion flashcard system. This pract...Read More
Learn how to implement a Notion flashcard system. This pract...Read More
How to use Notion
November 23, 2025

Build Your Perfect Memory System: Notion Flashcard Template
Build Your Perfect Memory System: Notion Flashcard Template
Learn how to create a personalized Notion flashcard system t...Read More
Learn how to create a personalized Notion flashcard system t...Read More
Resources
November 22, 2025

How to Manage Your Sales Pipeline with a Notion CRM Template
How to Manage Your Sales Pipeline with a Notion CRM Template
How to effectively manage your sales pipeline and client rel...Read More
How to effectively manage your sales pipeline and client rel...Read More
How to use Notion
November 2, 2025

heyalbert.co
Copyright © HEYALBERT DIGITAL 2026. All rights reserved.
heyalbert.co
Copyright © HEYALBERT DIGITAL 2026.
All rights reserved.
heyalbert.co
Copyright © HEYALBERT DIGITAL 2026. All rights reserved.